
Crazy
Fun 9-Patch Quilt Blocks
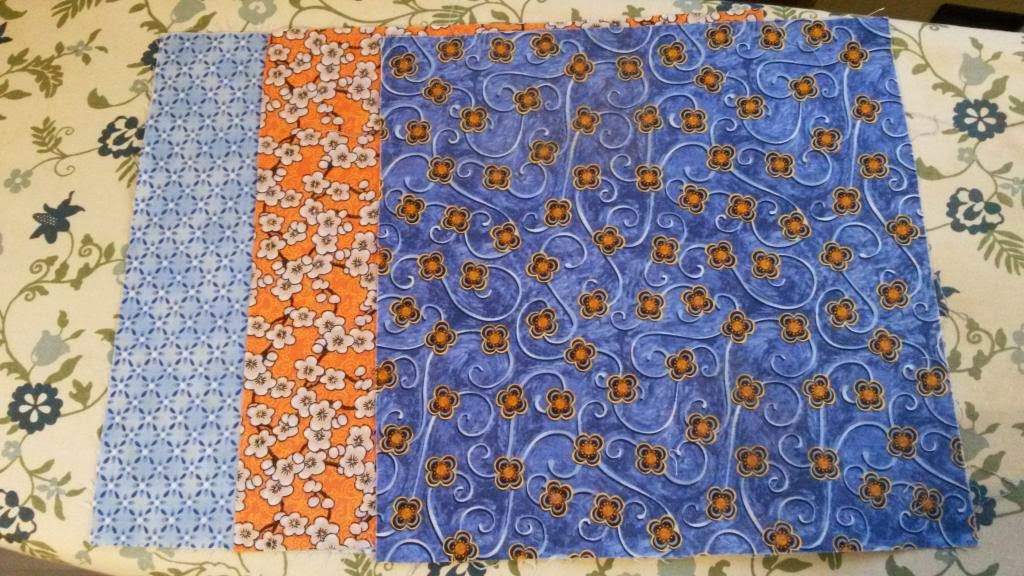
Begin with three 11” squares of good quality
quilting cotton fabric—because it’s a scrappy block, the colors and prints don’t
have to match at all, but I like to put a light, a bright and a darker valued selection.
It makes the pattern show a little better.
Using your rotary cutter and quilt ruler, cut an angled cut through all three squares at once. There is no rule for this cut except make sure you have enough at the narrowest part to make a visible patch when it’s all finished.


Next take the top piece on the left side and put it
on the bottom of the stack

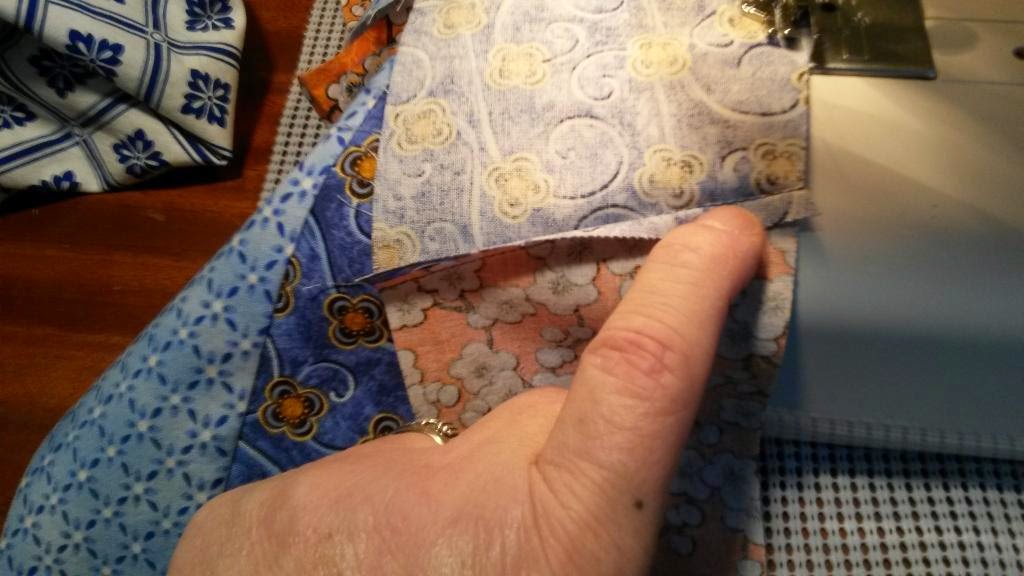
Sew the narrow pieces onto the left side pieces,
with a ¼” seam allowance.

Press the seams to one side and press the square
open. Re-stack the way they were before
you sewed them.

Turn counter clockwise so the narrow piece is on the
top, and make another angled cut down the right side..

Take the top left piece and move it to the bottom

To make it easier to keep the
stacks in order, I flip each over to the left as I match the cut piece to the
bigger piece.

As you press the seams, you will
see that they often will be angled in the same direction


.
Fold the top one to the opposite
direction when you sew it for a smoother flatter block.
The next seamed and pressed open
stack should look like this:

Cut again on the right side and…

… move the top left piece again to
the bottom.

Your three blocks should look something like this:

Stack them again, rotate and cut the last angled cut on the right and
move the left piece again to the bottom.

The final blocks should be arranged
like this, three diagonal patches should be the same:
light

bright

darker

I sew them one after the other
without cutting them apart so the order stays right, and...
 I can press the seams
all at once to the proper side, then clip the threads between the blocks and
press them open.
I can press the seams
all at once to the proper side, then clip the threads between the blocks and
press them open.
On the seam side, one pair should
go outward…

…and on the other side they should
go inward.

The back of the finished block should be nice and
neat.

Here are the three finished blocks


